Preset morpher allows you to set — and morph — between presets, via MIDI. You create the presets on ZOIA, store them, and send them out to pedals/synthesizers/anything that accepts MIDI.
You can store up to 8 parameters in up to 8 preset slots. You can select presets from the front panel, or linearly via the left and middle stompswitches (this will cycle through the presets). You can also automate preset selection (again, linearly) to create a sort of preset sequence.
You can use an expression pedal, MIDI CC (default CC 10, channel 1; the module is found on the third page; see the entry “Personalize it” below for more information), or the provided LFO to morph between any two presets. You can also set an internal morph time that will transition between two presets when you change from one to another.
Audio will pass through the patch in stereo. The inputs and outputs are located on the second page.
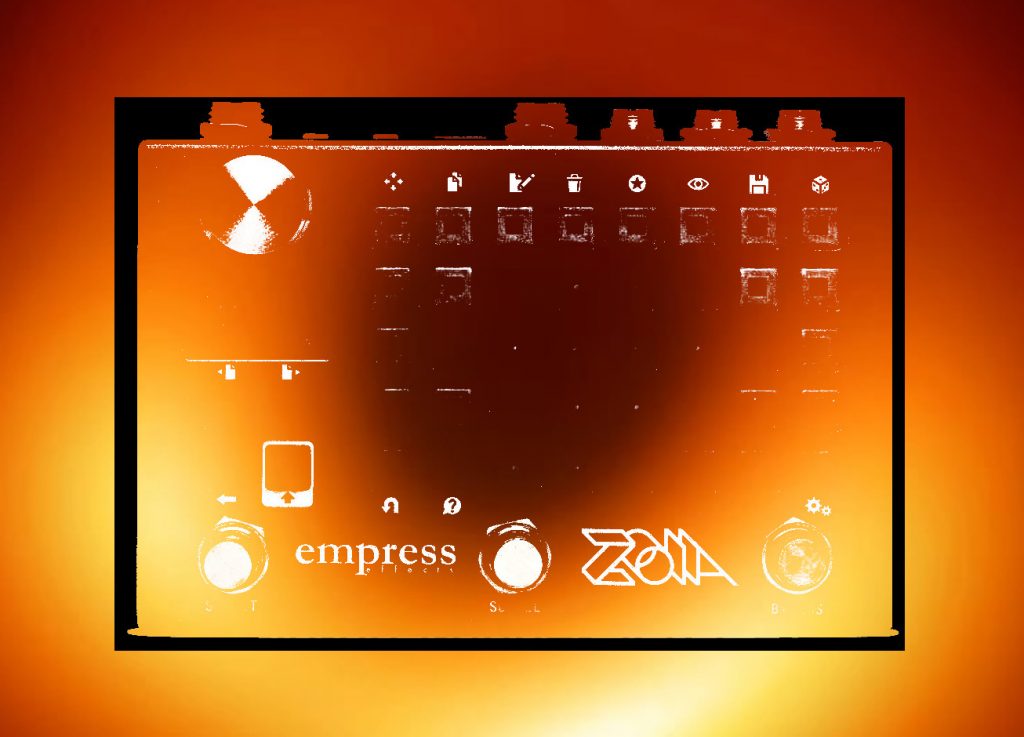
Basic workflow —
Step one: Set CC outs to correspond to the parameters on external device you want to control. The CC out modules are located on the second page, titled “MIDI.” They CC number and channel needs to be set on each of the modules. (Pro tip: the CCs can be set to different channels, which means you can use the patch to control more than one device at once.)
Step two: Return to the front page. Enter “live mode,” if you are not already in live mode. In live mode, the parameter controls across the top row are active, allowing live changes; if any of the preset buttons on the second row are white, press that button again to return to live mode.
Step three: Change some parameters around until you find settings you like.
Step four: Store the settings as a preset using one of the aqua buttons on the fourth row. There are eight slots to save to. (Pro tip: I like to use at least one slot to store a “zeroed out” position. This can come in handy later for morphing from an unaffected to affected condition.)
Step five: Press the corresponding preset button (the orange buttons on the second row) to recall the saved settings. The pixels on the third row will change intensity to show the preset’s stored settings.
Avanced workflow —
Step six: Press a different preset button to recall a different preset. Change presets however you like and hear your device change in response.
Step seven: Select a morph controller (yellow buttons bottom row, e.g. expression pedal) to morph between the current setting and the previously selected setting using that control. (Morphing will always occur between the current preset’s settings and the previously selected preset’s settings.)
The low position of a control — heel on an expression pedal, CC value 0 using a CC#, etc. — will be the settings of the currently selected preset, with the high position — toe on an expression pedal, CC value 127 using a CC#, etc. — will be the settings of the previously selected preset.
Step eight: Set a morph time to automatically morph between settings when you change presets. The morph time control is bidirectional. With either positive or negative values, the morph time can go up to 30 seconds. Negative values will use an exponential curve for morphing; positive values will use a linear curve.
Step nine: Use the left stompswitch to scroll forward through presets. Use the middle stompswitch to scroll backward. In the bottom right corner is a control called “Preset number” that lets you limit how many presets you will scroll through.
Step ten: Automate preset select by pressing the button in the bottom right corner. The right stompswitch will set tap tempo. MIDI clock can also be used.
Personalize it —
The parameters can be renamed to the destinations they control.
The morph controllers can be changed. The third page “Morph inputs” has a CV in switch where the three options are stored (the morph LFO is on the front page, but it is connected to this switch via a value module “pass through”). Change the inputs to whatever suits your fancy (or workflow). Sequencers, envelope followers, MIDI aftertouch, different MIDI CCs, etc. etc. etc. You can rename the radio buttons on the front page once you have done so.
Since you can scroll through the presets with stompswitches or via automation, think about what presets you might want adjacent to one another, for hands-free preset changes.